


Recipes for these fried spring rolls (Po Piah Tod[1] ปอเปี๊ยะทอด) vary so greatly that you’re not likely to find two family recipes that are identical. It’s fairly safe to say, though, that the ones most commonly found in the central part of Thailand usually contain glass noodles or mung bean threads (wun sen วุ้นเส้น), bean sprouts, and wood ear mushrooms. This recipe from my aunt’s kitchen is quite typical in that way. What I love the most about her fried spring rolls – something I don’t always find in other versions – is the aroma of the quintessential garlic-cilantro root-peppercorn paste.
Good spring rolls must taste good on their own, in my opinion. Poorly-made, bland fillings that exist just to live off of the charisma of crispy spring roll skins and flavorful dipping sauce are too underachieving to be worth the calories.
Yes, I’m looking at you, cheaply-made $6.99 lunch special spring rolls, stuffed to the gills with cabbage-heavy filling whose raison d’être, apparently, is to keep you tubular.
By the way, my aunt likes to use lump crab meat in this recipe (she adds it to the pan just before she takes it off the heat). I use tofu here solely because I have some left over from the photo shoot for my earlier post on Pad Thai ingredients. You can use any meat you want.

With the issue of properly-seasoned filling being very important out of the way, the only thing left to discuss is how to fill and roll these spring rolls.
It will take some practice, and your first 4-5 would probably look funny (my first few dozens sure did). But I hope these instructions would help some.
Start by placing a spring roll wrapper (use good-quality spring roll wrappers[2]) on a smooth surface that doesn’t move (I recommend against doing this on a plate, unless you can figure out a way to keep it from moving around on the counter. It’s best to do this right on the kitchen counter or a large, immovable chopping block).
Make a straight line between point A and point B in your mind, then mentally make a horizontal line (paralleling with the A-B line) at the half-way point between the A-B line and the corner that faces you.
Based on my experience, if you keep the filling between these two invisible horizontal lines, the rolling will be easy.

Then fold the wrapper over the filling. Be sure to tuck in the corner securely under the filling, pulling the filling towards you as you go. This is a critical point, because unless the filling is rolled tightly at the initial stage, you won’t get a properly-rolled spring roll. The goal is to get a finished spring roll that doesn’t have the filling rattling inside it.
So be sure to pull the filling towards you with the help of the bottom part of the wrapper. The filling wants to be tightly embraced, not just loosely covered.

Then fold the two side corners over towards the middle as shown.
The most important thing at this point is to make sure that, after the two corners have been folded in, the remaining part of the wrapper tapers towards the end tip. This makes it much easier to create nice, compact, uniform spring rolls. You’ll see why as you do this.

Then keep rolling, pulling the filled portion towards you as you go. The wrapper will taper more and more towards the opposite tip.
Once you’re about 2-3 inches away from the tip, stop to moisten the wrapper with water. Moisten it quite liberally, but not to the point of it being soaking wet.

Then finish up the rolling. Make sure the end tip is tightly sealed. What you see in the photograph above shows how the end tip is not sealed quite completely. This will result in the tip curling up in the frying pan, and you don’t want that. When sealed properly, everything should look seamless.
Place each rolled spring roll seam-side down, and press it lightly to secure the end tip.

While unfilled spring roll skins need to be kept under a kitchen towel (because they need to be soft and pliable to be filled and rolled properly), filled unfried spring rolls shouldn’t be kept under a towel. Many recipes suggest that they be kept under a towel, and I always wonder why, because from my experience that has always resulted in the wrappers getting soggy. And soggy spring rolls are prone to bursting open in the hot oil.
The best thing to do is arrange them on a large platter or baking sheet in a single layer, making sure they don’t touch each other. There’s no need to cover them up thinking that exposure to air will dry them out. For fresh spring rolls, exposure to air would be a bad thing. But these spring rolls will be fried, and dehydration in this case actually makes for crispier end products.
Since these rolls are best served immediately after they’ve been fried, it’s best to keep them at this stage until you’re ready to fry them and serve them up. You can even freeze them and fry them frozen; do not defrost them.
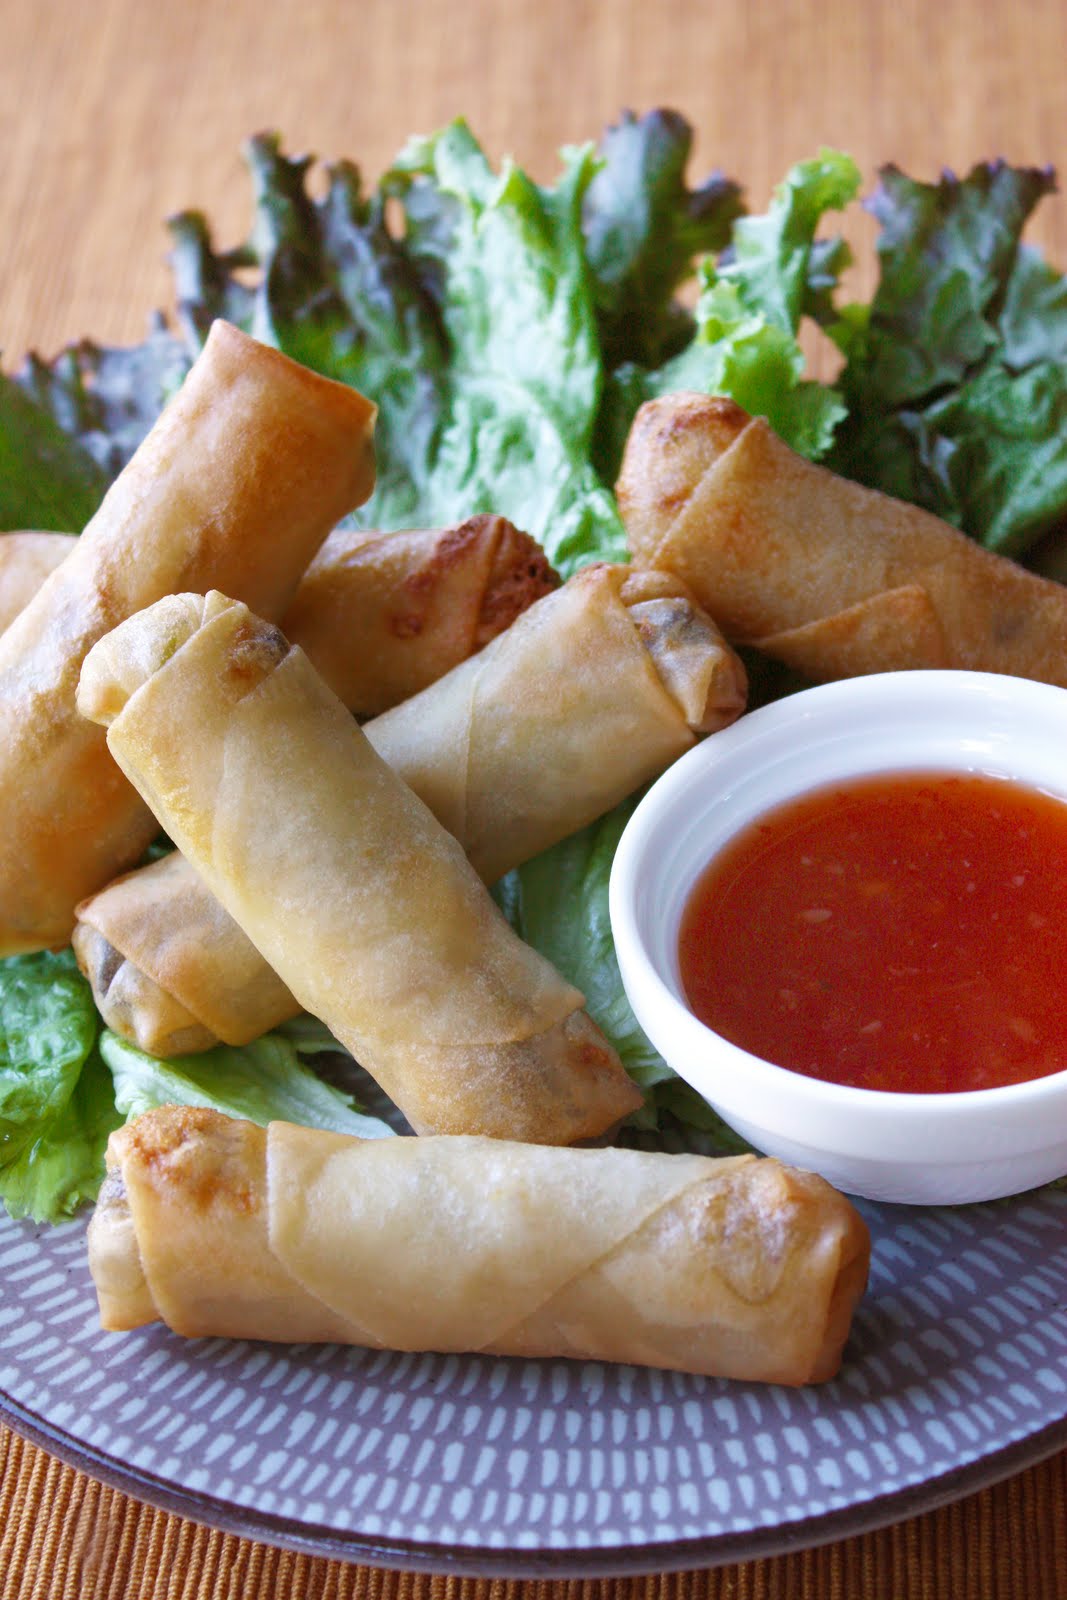
Many make a thinner version of Thai sweet chilli sauce to go with these spring rolls. But whether or not I should, I always use my homemade Thai sweet chilli sauce since I always have it in the fridge.

- 36-40 6″x6″ frozen spring roll skins, thawed and kept under a kitchen towel
- 226g firm tofu, cut into 1″ matchsticks
- 80g dried glass noodles or mung bean threads, soaked until pliable and cut into 5″-6″ pieces
- 226g fresh bean sprouts
- 20g dried wood ear mushrooms, soaked in warm water until pliable and sliced thinly
- 20g peeled garlic
- 20g finely chopped cilantro stems or roots
- 4g whole white peppercorns
- 2 tablespoons fish sauce
- 1 tablespoon oyster sauce
- 2 tablespoons vegetable oil
- ¼ cup water or sodium-free broth
- 1-1½ cups vegetable oil for frying
- Thai sweet chili sauce, store-bought or homemade
- Make the seasoning paste by pounding together in a mortar, the garlic, cilantro roots, and peppercorns; set aside.
- Put the 2 tablespoons vegetable oil in a large skillet and set it on medium heat. Fry the seasoning paste until fragrant.
- Add the tofu to the pan, followed by the mushrooms and the bean threads.
- Add the water or broth to the mixture along with the fish sauce and oyster sauce; stir-fry until the bean threads start to soften up.
- Observe the moisture in the pan and adjust the heat accordingly. You don’t want the filling to scorch and burn; at the same time, you don’t want a wet filling either.
- Once the excess moisture has evaporated and the bean threads are softened, add the bean sprouts; stir just until the sprouts are wilted.
- Take the skillet off the heat and allow the filling to cool completely. The filling must be cooled before they can be used; otherwise, the residual heat will create steam inside filled spring rolls and cause the skins to break during the frying.
- Fill each spring roll skin with 1-2 tablespoons of the filling, following the instructions in the post.
- Put the remaining vegetable oil in an 8-inch skillet set over medium-high heat. Fry 3-4 spring rolls at a time until crispy and golden brown.
- To avoid deep-frying, you can arrange the spring rolls on a baking sheet and brush the outsides thoroughly with vegetable oil. Bake them seam-side down in a 375°F oven until crispy. Baked spring rolls will not be golden brown like fried spring rolls and they lose their crispiness sooner than their fried counterparts. But when fresh out of the oven, they’re crispy and delicious.
- Serve the spring rolls with the sweet chilli sauce.
[1] The official transliteration of ปอเปี๊ยะทอด is po pia thot.
[2]This is a very good brand.
8 Responses to Fried Spring Rolls (Po Pia Tod ปอเปี๊ยะทอด)