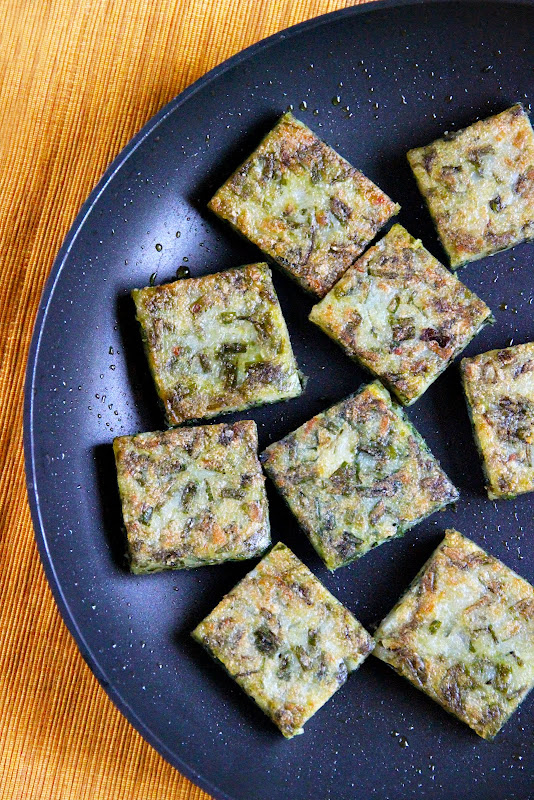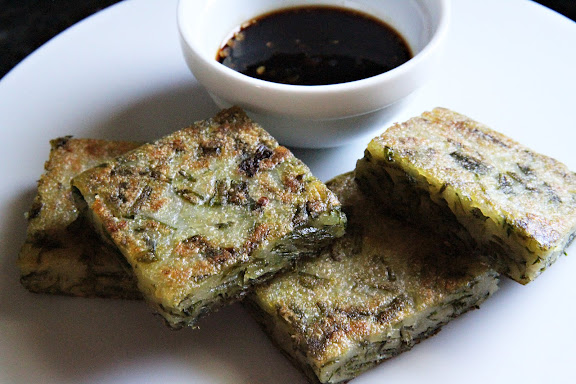
One of the most commonly seen street food items in Bangkok is these chive cakes. As opposed to their (almost always) round, filled cousins that are sold in both steamed and steamed-then-pan-fried forms, these square chive cakes are always pan-fried until the exteriors are crispy. Both varieties are often found right next to one another. They’re also served with the same spicy, sweet and sour dipping soy sauce.
My favorite kind of Chinese chive cakes is the round, filled kind. I also like them steamed and not fried. But since I have not been able to perfect a recipe for that type of chive cakes (not much luck with many of the recipes out there including my mother’s), this has got to do for now.
Though not my favorite, these crispy-on-the-outside-chewy-on-the-inside pan-fried cakes are a heck of a lot easier to make. There’s no need to pre-cook the dumpling dough; there’s no need to fill and pleat the dumplings (which is harder to do than it looks). The only thing to watch out for is not to get carried away with the chives and add too much of them to the batter thinking it will improve the recipe. Too large an amount of chives results in the cakes not being able to hold their shape very well when cut and pan-fried.

Things to consider:
- I’ve listed both weight and volume measurements for your convenience. However, I very much prefer that you go with the weight measurements; they’re much more accurate. And when it comes to something like this where texture is so very important, precision is key.
- Before embarking on this project, think about how you’re going to steam the chive cakes. I use an 8″x8″ ceramic pan as my “cake mold.” And since I have a large Thai-style aluminum stackable steamer into which my 8″x8″ pan fits perfectly, I’ve never had any problem with the steaming. If you don’t have a large steamer, a creative solution is needed.
- What kind of steamer do you have then? A bamboo steamer will do. An electric steamer will do as well.
- One viable option is the splatter guard-pot combo. The problem with that is that the splatter guard screen may not be able to hold the weight of both the batter and the ceramic pan very well. Besides, that steaming method works best when the object is steamed directly on the splatter guard, not inside another container.
- Regardless of the type of steamer you end up using, the key thing is the container in which the batter is steamed. My 8″x8″ pan has enough surface area to allow the batter to come up to only 1/2 inch in height. This is perfect; this is what you want. Anything with more surface area will result in the batter spreading out too thinly. Likewise, anything with less surface area (even though it may come with sides tall enough to contain all of the batter) will result in chive cakes that are too thick. So choose your container (or containers) wisely.
Pan-Fried Chive Cakes (ขนมกุยช่ายแบบสี่เหลี่ยม)
Khanom Kuichai
Makes 16 2″x2″x.5″ cakes (enough for 4 people as an appetizer)
Printable Version

1/2 lb (250g) Chinese chives (one of the essential ingredients for Pad Thai)
3 large cloves (14g) garlic, peeled and minced
1 1/2 teaspoons salt, divided
1/2 teaspoon baking soda (This is optional. Many recipes call for baking soda because it helps the chives preserve their bright green color. But I’ve found this trick to be more relevant to the filled variety of chive cakes where the chive filling is encased inside the dumplings. When it comes to these pan-fried, unfilled chive cakes, the chives turn brown in the process of pan-frying anyway, with or without the baking soda. I wouldn’t bother with it.)
1 cup (112g) rice flour
1/4 cup (30g) glutinous rice flour
1/4 cup (30g) tapioca flour
1 1/4 cups plain water, room temperature
An 8×8-inch pan
Vegetable oil for sautéing, greasing the pan, and pan-frying
Dipping Sauce
1-2 bird’s eye chilies (more or less depending on your heat tolerance), minced
1/4 cup dark soy sauce
1/4 cup sweet dark soy sauce
1/4 cup sugar
2 tablespoons white vinegar
- Trim off the tough bottom parts of the chives, and cut the tender green parts into small pieces, about 1/4 inch long.
- In a medium skillet, heat about 1 tablespoon of vegetable oil over medium-high heat. Add the garlic, followed by the chives, 1/2 teaspoon salt, and baking soda (if used).
- Stir-fry until the chives have wilted slightly, about 1 minute.
- Transfer the chive mixture to a large platter, spreading it out thinly so the mixture cools faster.
- While waiting for the chives to cool, mix the three flours and the remaining 1 teaspoon of salt together in a mixing bowl. Whisk in water to make a batter.
- Once the chive mixture is cooled, squeeze out some of the liquid which collects at the bottom of the plate and discard it. Add the chive mixture to the batter; mix well.
- Prepare your steamer. Make sure the water is boiling.
- Grease an 8x8x2-inch pan with some vegetable oil. Pour the chive batter into the pan.
- Steam for 25-30 minutes or until the center is cooked through. The chive cake will turn somewhat translucent.
- Let the steamed chive cake cool completely.
- In the meantime, make the dipping sauce by putting the dipping sauce ingredients in a small saucepan and bringing the mixture to a gentle boil. Once the sugar has dissolved, remove the saucepan from heat and allow the dipping sauce to cool.
- Cut the chive cake into 16 squares.
- Place enough vegetable oil in a skillet so that it comes up about 1/4 inch from the bottom of the pan. Put the pan on medium-high heat.
- Once the oil is hot, gently lower the chive cake squares into it. Pan-fry until both sides are crispy and thoroughly browned. Remove the cakes from the pan and allow them to cool down a bit.
- Serve the fried chive cakes slightly warmer than room temperature with the prepared dipping sauce.
Note: steamed chive cakes can be frozen and thawed before pan-frying. Pan-fried chive cakes can be reheated either in a skillet or in a 375°F oven until outside crispiness is restored.


13 Responses to Pan-Fried Chive Cakes (ขนมกุยช่ายแบบสี่เหลี่ยม)