With the line-up of curry posts planned for this year, I thought it would only be appropriate to introduce to you at this point the Thai dynamic duo:
(สาก).
. In fact, I look upon with suspicion anyone who claims to be a serious Thai cook yet doesn’t own at least one set of mortar and pestle, just as I would anyone who claims to be a serious Chinese cook yet doesn’t own a wok or a cleaver.
prepared curry and chilli pastes had already been available at local fresh markets and making curries with prepared pastes wasn’t at all regarded as lame. Now, back in the days when my grandmothers were growing up, not knowing how to make curry pastes from scratch would make you somewhat lame. (And when I say, “somewhat lame,” I’m being reserved.) The making of curry and chilli pastes in the Thai culture back in those days was a mark of class. It was important.
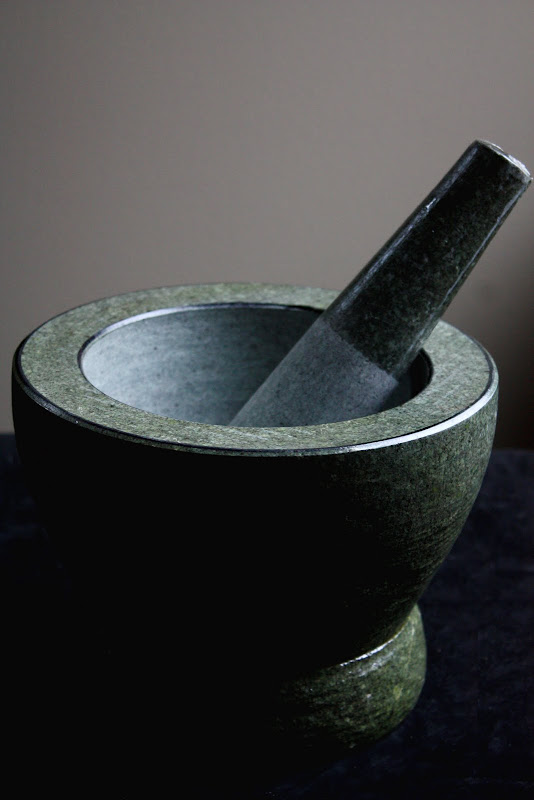
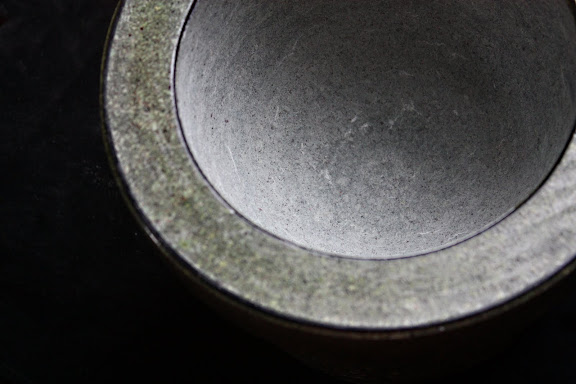 A granite mortar – Perfect for making curry pastes.
How important? Aristocratic families with ties to the palace would send their young daughters to live with their relatives who were courtiers or councilors. Living in the palace compound would expose a young girl to culture, refinement, culinary arts, crafts, and other things that contribute to her becoming a “lady” and, according to the mindset in those days, worthy of marriage to high-status men.
My maternal grandmother, who was a bit of a rebel, mentioned how she, as a young woman, laughed at the idea of being evaluated by the rhythm of the pounding of the pestle. You see, according to Khun Yai, it’s common for a young bachelor’s mother to pay a visit to the home of the young woman who she thought might make a suitable mate for her son. Under the guise of a visit to the parents, the woman’s real mission would be to see whether the daughter of the other family could cook, make beautiful jasmine garlands for Buddha, sew, etc. While the parents enjoy their conversation, the young woman would be asked to go into the kitchen and prepare a meal. And although at that point you can’t see what the heck she does in the kitchen, the rhythm of her pounding the pestle against the mortar in the process of making curry paste from scratch (which can be heard from afar) would be a telltale sign of her culinary skill, or lack thereof.
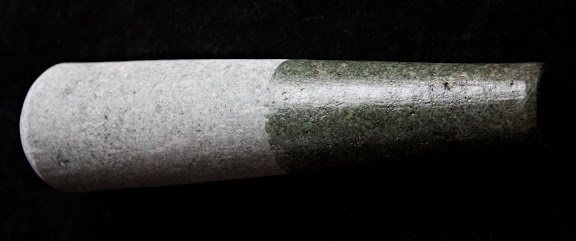
A granite pestle is to be used with a granite mortar only.
According to Khun Yai, consistent, evenly-paced beats which go on for a while then stop completely suggest the woman knows what she’s doing and is focused on her task from the beginning to the end without allowing herself to be distracted. An irregular, start-and-stop rhythm, on the other hand, suggests a lack of focus and a tendency to goof off in the kitchen. Behaviors demonstrated in the kitchen, people back then believed, indicate behaviors outside the kitchen as well. I don’t know how seriously I should take that story, but other people’s grandmas have told a similar tale.
Being very progressive in her days, Khun Yai didn’t go through anything like that; she picked whom she loved and married without having to prove herself by means of banging two pieces of granite together in ways that enhance the perception of her worth.
My paternal grandmother, Khun Ya, on the other hand, was classically trained. She made everything from scratch. Khun Ya made her own curry pastes from garden herbs and spices (which grew in the backyard), grated her own coconuts (which also grew in the backyard), insisted on cooking food in banana leaves (which, yes, grew in the backyard), etc. When I was a kid, every time I visited her, I was always told to grate coconut with a coconut bunny and extract coconut milk for the curry we were having that night. While my maternal grandmother would occasionally listen to — I kid you not — the Rolling Stone while sipping cold Singha beer, my paternal grandmother would try (unsuccessfully) to encourage me to play this traditional Thai instrument that I loathed, prepare lotus flowers, and make jasmine garlands.
If you ever wonder why I am such a confused individual, now you have your answer.
This post is not meant to show you how to make curry or chilli pastes. That’s what’s to come in future posts. For now, let me relate to you a few things that pertain to khrok and sak.
* The mortar and pestle used in home kitchen, as far as I know, come in three different materials: granite, glazed terracotta, and wood. The first two are still in use; the last, it seems, has gradually fallen out of use due to the fact that wooden mortars tend to get moldy when they’re not dried properly between uses. There are still some varnished wooden mortar and pestle sets available, but they tend to be ornamental.
* A granite mortar comes and is supposed to be used with a granite pestle. A terracotta mortar comes and is supposed to be used with a wooden pestle (there’s no such thing as a terracotta pestle). You don’t mix and match. You could, but you shouldn’t. Pounding a granite pestle into a terracotta mortar is, to put it mildly, ill-advised. Pounding stuff in a granite mortar with a wooden pestle is just, well, odd.
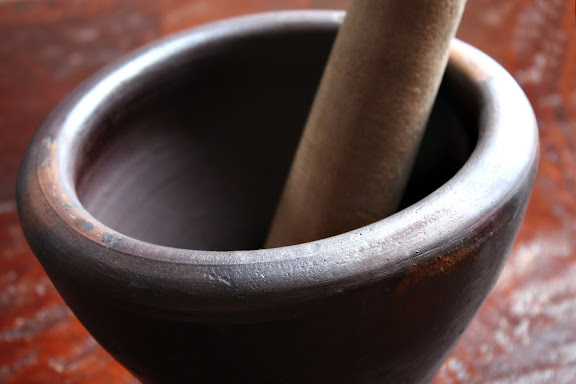
A glazed terracotta mortar is paired with a wooden pestle.
* I find it strange to see some non-Thai chefs use the Mexican molcajete to make Thai curry pastes. The tool is too shallow and designed for grinding rather than pounding. The herbs and spices used in Thai curry pastes are meant to be pounded to a paste, not squished between two stone instruments with your wrist swiveling as you go. This may sound like hair splitting to some of you, but, trust me, at least as far as I’m concerned, the fastest way to lose your credibility as a Thai cooking authority is to be seen preparing Thai curry pastes in a molcajete or a mortar-pestle set made of marble.
* In other words, you want your mortar and pestle for the making of curry paste to be made out of solid granite (both the mortar and the pestle).
* When choosing a mortar, don’t go by its weight or overall size; use the capacity of its inner bowl as the main criterion. Too small a bowl makes it difficult to pound your curry paste ingredients into a smooth paste since there’s so little room for things to move around, and the pieces tend to spill out of the bowl a lot. Mine comes with an inner bowl that measures 6 inches across and 6 inches from the rim to the middle point of the bottom. The surface of the bowl is machine-smoothed. This size mortar is enough to make about 4-6 ounces of curry paste at a time (anything more than that would be pushing it) which is enough to make a huge pot of curry — enough for 8-10 servings.
* In general, if you want to pound something to a fine paste, you use a granite mortar; if you want to lightly bruise or mix something, as in the case of Som Tam (Thai papaya salad), you use the terracotta or wooden mortar. Again, the fastest way to lose your credibility as a Thai chef is to be seen pounding raw papaya to death in a granite mortar; it’s just not done.
* After you’re done using a mortar, be it the granite or wooden or terracotta kind, rinse it off with warm water and wipe the bowl dry. Even more care should be given to a wooden pestle as it’s more susceptible to mold. Make sure it’s dried thoroughly before you store it.


