Archive | She Thais RSS feed for this section

How to Make Khao Man Gai ข้าวมันไก่: Thai Version of Hainanese Chicken and Rice

khao man gai recipe

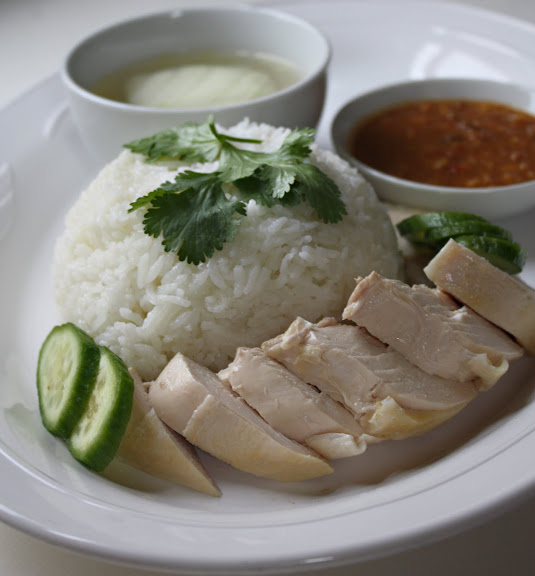
Cleaver-flattened pieces of chicken come with your KMG in Thailand.
No reason why you can’t have big, juicy pieces of chicken like this!

Khao Man Gai, one of the most common street foods in Thailand, is, in short, a mutation, albeit controlled, of Hainanese chicken and rice. Overshadowed by the original dish and rarely included on the menus of most Thai restaurants in the West, Khao Man Gai (RTGS: khao man kai ข้าวมันไก่) is not widely known outside of Thailand. For us, however, this is a national favorite. In fact, just the mere mention of the name could cause collective panting in greedy anticipation.

And the reason is simple — it tastes good. How can you say no to slices of juicy and tender capon meat served with fragrant rice cooked in rich broth and a unique piquant sauce of ginger, garlic, chillies, and soy? As much as I adore the Hainanese version, it just so happens that I had already fallen in love with the Thai version before I discovered the original. I like the more spicy sauce offered by the Thai version as it balances out the richness of the chicken and the rice better, in my opinion.

From my description of this dish as a mutation, you can probably tell that it is not exactly identical to Hainanese chicken and rice. Then again, it should be noted that Khao Man Gai should not be regarded as a failed attempt to replicate the original and, therefore, inferior. The dish has become an almost entirely new entity — a delicacy in its own right. In fact, although most Thai people intellectually know that the dish is inspired by a Hainanese dish, I think we have come to think of this version as our own.

What amuses me about Khao Man Gai is how its appearance is the same regardless of where you find it in Thailand. It’s as if there’s a universal code governing the manner in which the dish is to be presented which all Khao Man Gai vendors nationwide abide by. Slices of steamed or boiled capon meat are placed over a mound of rice. Cucumber slices and fresh cilantro leaves serve as a quintessential garnish. Sometimes, a few slices of cooked congealed chicken blood (it’s not that bad …) is also added to the mix. The chicken-rice plate is then accompanied by a bowl of piping hot chicken consommé with a few pieces of Chinese winter gourd (whose Thai name is pronounced exactly like the way this little girl pronounces “frog“) swimming in it. The broth, to be slurped between bites, helps move the chicken and rice along your esophagus more smoothly.

I was actually salivating like a hyena while typing the previous paragraph. Dignity is overrated.

_________________________________________

PRODUCTS THAT HELP YOU CREATE THIS RECIPE

This is an easy recipe for home cooks. For a somewhat more involved recipe and techniques employed by the pros at a restaurant in Bangkok I went to from childhood to 2012, see Bangkok cookbook.

Khao Man Gai (or Khao Mun Gai) Recipe
(Serves 6)
Printable Version

[Check out vegan Khao Man Gai Tofu by Neven Mrgan of Panic Blog]

[Added 5-8-12: Hey, whaddayaknow, Neven is at it again. Check out how he’s incorporated Khao Man Gai sauce into a Khao Man Gai burger.]
Khao man gai recipe
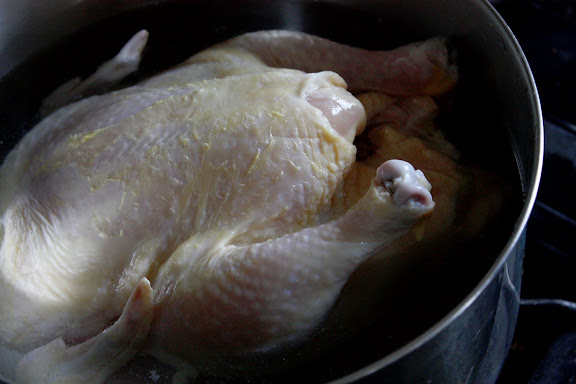
First prepare the chicken: Place one large capon or roaster in a big stockpot and add water just until it barely covers the bird. Add a tablespoon of salt to the water and bring the whole thing to a boil. Once the water starts boiling, lower the heat and let it simmer on low, covered, until the chicken thighs move easily — a sign that the entire bird is thoroughly cooked. (You don’t want to cook the chicken beyond this point. The meat should have firm, bouncy texture, not be falling-off-the-bone tender like stewed chicken.)
Khao man gai recipe
Place a large bowl in the kitchen sink and fill it with iced water. This is to keep the residual heat from further cooking the chicken as it cools down. The iced water bath helps keep the chicken meat moist, firm, and juicy. Gently remove the chicken from the pot, shake off the liquid inside the cavity, and dunk the chicken into the iced water. Leave the chicken in the iced water until the entire bird has cooled down to room temperature. Remove the chicken from the water, pat it dry with paper towel, carve it, and set it aside. Keep the chicken on a covered platter.
Khao man gai recipe
Then make the rice: Rinse 2 cups long grain rice until the water runs clear and drain. Skim the fat off the surface of the liquid in which the chicken is cooked into a measuring cup; add enough water to the measuring cup to make a total of 3 3/4 cups of liquid. Make sure the water is very cold so that when it’s added to the fatty broth, the mixture is at room temperature which is ideal for making rice.

Khao man gai recipe
Stir in a teaspoon of salt (or a couple of teaspoons of soy sauce if you like your rice darker in color) Add the chicken fat-water mixture to the rice. (Don’t be scared of the fat; this is, in fact, the “man” in Khao Man Gai and what gives the rice such great flavor.) A piece of fresh ginger, a smashed clove of garlic, a bruised cilantro root, or a few white peppercorns can be added for extra flavor, but if you don’t have these things, don’t worry about it.

Cook the rice however you’d like: on the stove top, in the microwave, or — the best and the easiest way — in an electric rice cooker.
khao man gai recipe
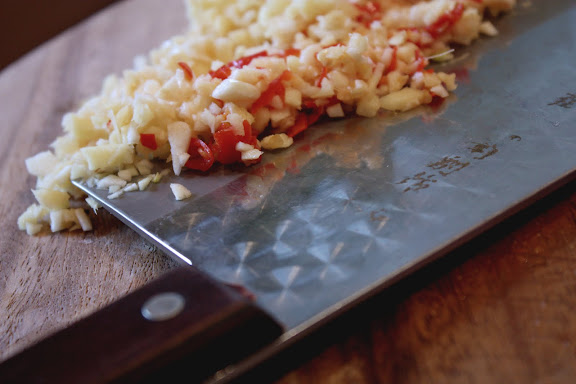
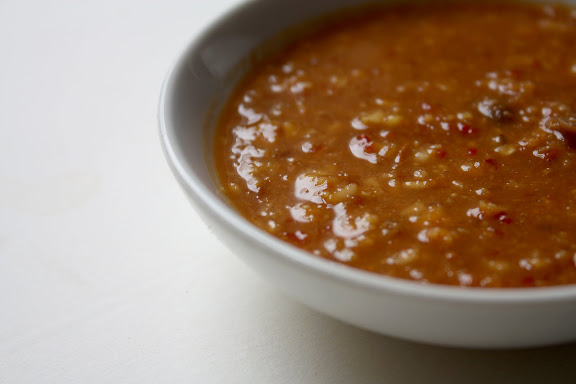
Make the sauce: In the meantime, put about 1/3 cup of roughly chopped fresh ginger (the more fibrous, the better, in this case!) into a food processor along with 4 medium cloves garlic (peeled), 5-8 red or green bird’s eye chillies (the number depends on your heat tolerance), and 1/2 cup fermented soybean sauce, 1/2 cup sugar, 1/4 cup dark sweet soy sauce, 1/4 “white” of thin soy sauce (information about dark sweet soy sauce and “white” (thin) soy sauce can be found in my post on soy sauces used in modern Thai cooking), and 1/3 cup white vinegar (not rice — oh gawd, not rice vinegar); pulse everything into a coarse puree. Pour the sauce mixture into a small saucepan and bring to a gentle boil and remove from heat after 30-40 seconds. Let the sauce cool down and adjust the seasonings as needed. In my opinion, the sauce should be primarily salty and sweet with a bit of sour taste from the vinegar. (You can make 3-4 times the amount of sauce and freeze it to use later. The sauce freezes beautifully and thaws easily.)
Khao man gai recipe
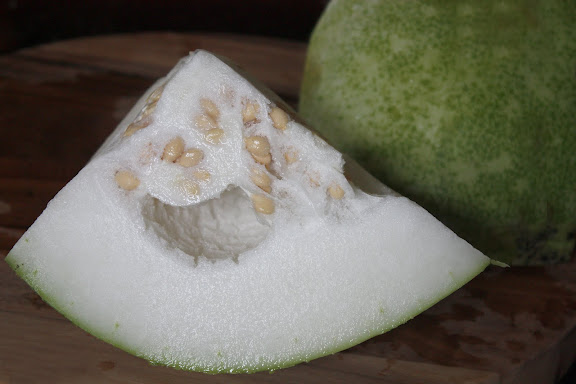
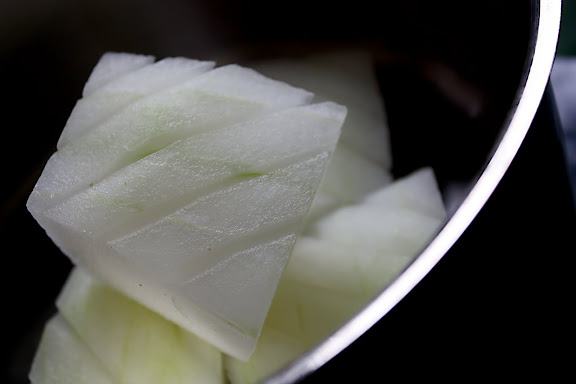
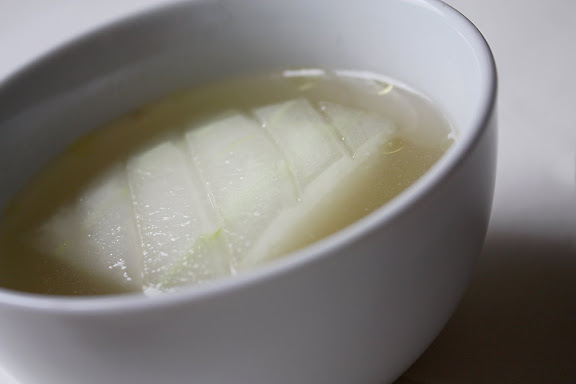
For the winter gourd soup: Peel and deseed approximately 2 pounds’ worth of Chinese winter gourd (daikon or chayote can also be used). Cut the gourd into 2″ x 2″ pieces. Place the gourd pieces in the liquid in which the chicken is cooked. (After the fat has been skimmed off, the remaining liquid should be quite clear.) Bring it all to a boil, lower the heat, cover the pot, and simmer for 7-8 minutes, or until the gourd is tender but not mushy. Season the broth with salt or fish sauce (soy sauce will darken the broth too much.)
Khao man gai recipe
To serve: Put a mound of rice on a plate and top with chicken pieces. The rice should be warm and the chicken at room temperature. The sauce can go in a small dipping sauce bowl on the side or be drizzled on top of the chicken. The necessary garnish includes fresh cucumber slices and cilantro leaves. (You can be creative with the way you plate your Khao Man Gai, but the Khao Man Gai police may be knocking on your door.)
khao man gai recipe
Serve the gourd soup piping hot in a separate small serving bowl. A light sprinkle of ground white pepper is not mandatory but highly recommended.

N.B. – This is not traditional, but several Khao Man Gai vendors have offered the option of substituting boiled/steamed chicken with fried chicken. If you’re interested, here’s a recipe for Thai-style fried chicken. You can use the same dipping sauce for the fried chicken version, or you can use it in addition to Thai sweet chilli sauce.

Comments are closed

How to Make Larb Gai – Lahb Gai – Laab Gai – Larp Gai – Laap Gai – Lahb Gai ลาบไก่

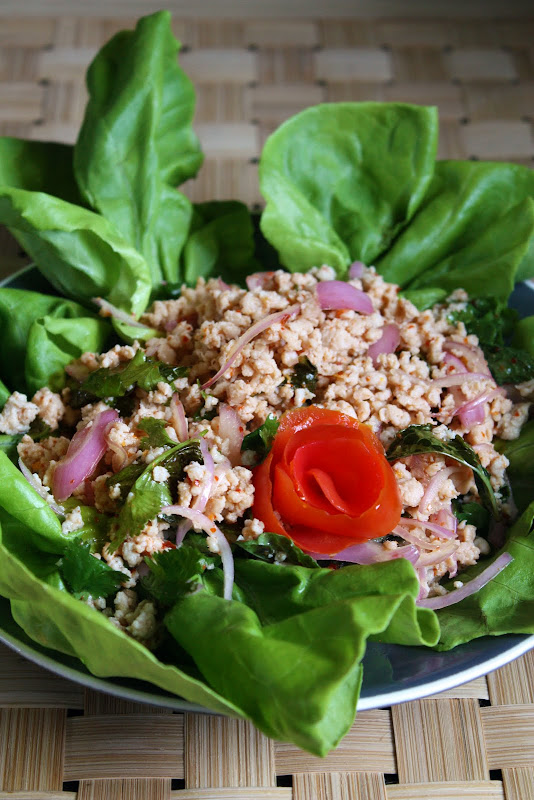
larb recipe
There is a good reason why the title reads the way it does. I am aware that when I show my face here, people expect me to talk about food. But if you know me very well, you will know that, as much as I love food and cooking, the majority of my time is spent in the areas not at all culinary in nature. And though I’ve tried to repress that non-culinary part of me when I come here, it sometimes slips into my site here and there.

Take the dish we have before us here for example. While it may be more appropriate to discuss the anatomy of the dish, the linguist in me just couldn’t overcome the urge to discuss the anatomy of its name. After all, there’s not much to talk about in terms of how to make the dish as you will soon see; it’s one of the simplest things to make. This version that you see here (which represents the most common overseas Thai restaurant version) is especially easy. But the name. (Sigh)

I don’t know if the inconsistencies in the way Thai words are transliterated into English ever drive anyone nuts the way they do me. (I guess this is one of those things where not caring is bliss.) Is it Som Tum or Som Tam, Tom Yum Goong or Tom Yam Gung? I could go on for at least 20 pages with my hypothesis as to why that is the case.

Nonetheless, in an attempt to keep the 7-8 readers that I have, I’ll just give you a one-sentence summary: The complete madness that is the romanization stems primarily from the blatant disregard for correctness and the lack of understanding about how language works and secondarily from the lack of agreement as to whether a word should be transliterated to reflect its vernacular pronunciation or its etymology. Continue Reading →

Comments are closed

Coconut Rice with Chives: How to Make Fluffy Coconut Rice

how to make coconut rice recipe
The best coconut rice, in my opinion, is made from quality long grain rice (that would be old crop Jasmine rice, if you ask me) and fresh coconut milk extracted from finely-grated mature coconut meat. The rice-liquid ratio is 1:2 or 1:1.5 depending on whether the rice is an old or new crop as the former has lower moisture content than the latter and therefore requires more liquid.

Depending on what you like, several different perfuming or flavoring agents may be added to the rice as it cooks: smashed fresh garlic, bruised fresh pandan leaves, smashed fresh cilantro roots, crispy fried shallots, etc. If you grew up in Southeast Asia, chance are you’ve had at least 4-5 different varieties of coconut rice. Each culture, each sub-culture, each household has its own version.

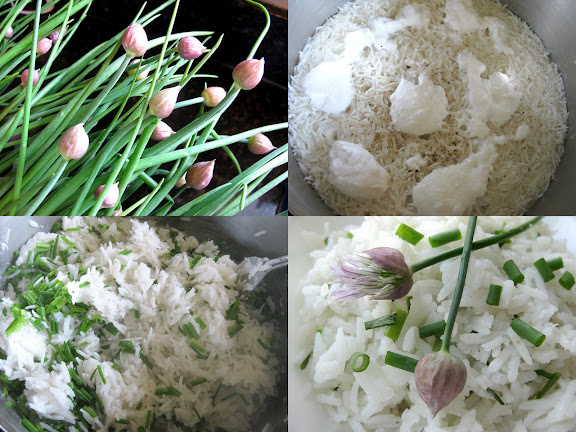
This one of mine has added fresh chives. It’s not the most traditional flavor, but I happen to think chives and coconut go very well together. Also, the method which I use is a little different from what is considered the standard. That is to say, while most recipes instruct you to cook long grain rice with coconut milk in lieu of plain water, mine holds off on the coconut milk until the very end.

I’m not very picky about the type of rice. (Having said that, I have to say Thai Jasmine rice will forever remain the love of my life. I may sometimes get infatuated with Basmati or Mochigome, but my dalliances with anything but Thai Jasmine have invariably proven short-lived; I always come crawling back to my true love.) I am, however, very picky about the texture of cooked rice. I can’t stand wet, gummy rice – a sign of over-hydration and/or too much starch in the liquid in which the rice is cooked. It’s similar to what happens to pasta when it’s cooked too long in too little water, and we all know how tragic that is.

how to make coconut rice recipe

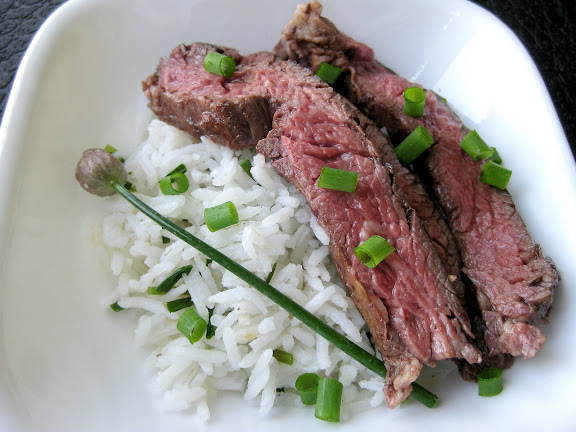
[Coconut rice served with grilled skirt steak marinated in soy sauce, ground coriander, and garlic.]

It could be just me. Perhaps other people have better luck making nice, fluffy coconut rice with canned coconut milk than I do. While I’ve never had problem making good coconut rice with freshly extracted coconut milk, every time I cook coconut rice with canned coconut milk (even my favorite brand which I normally consider godly and blameless), it often comes out wet and gummy. And since freshly-extracted coconut milk from freshly-grated coconut meat isn’t readily available where I live, canned coconut milk is my only option. As for spray-dried coconut milk powder, I think it has very little taste. The other problem is that regardless of whether the rice comes out wet and gummy or partially undercooked (which sometimes happens when I make a misguided attempt to reduce the wetness by using less coconut milk), the rice at the bottom invariably gets over-browned and sticks to the pot or the rice cooker. This makes me cranky.

I have recently learned to do things differently: I do not add coconut milk until the very end. This is the only method which has consistently yielded perfectly-cooked rice, fluffy and thoroughly perfumed with coconut milk with no hard, brown crust at the bottom of the rice pot. The coconut milk is added at the moment when the rice has absorbed all of the water or broth, yet is still not quite fully cooked, which means it is still capable of taking on additional moisture without turning wet and gummy. The use of broth is optional; it’s just an extra step to enhance the flavor. What’s not optional, however, is the rinsing of the rice. Rinsing helps wash off some of the starch which would otherwise get released into the cooking liquid and cause the gumminess. (Imagine what it’s like to cook your rice in starchy liquid similar to cornstarch or Wonder flour slurry.) I rinse my raw rice until the water runs clear.

how to make coconut rice recipeCoconut Rice with Fresh Chives
(Makes 4-5 cups)
Printable Version

2 cups uncooked long grain rice, preferably Thai Jasmine or Basmati
2 3/4 cups water or unsalted chicken or vegetable broth
1 cup good canned coconut milk, not the “light” variety which is too thin
1 teaspoon salt
1/2 teaspoon ground white or black pepper
3/4 cup snipped fresh chives

  • Put the rice in a heavy-bottomed pot or a rice cooker container and rinse it until the water is clear.
  • Add the water or broth into the pot, stir, and bring the rice mixture to a boil, uncovered, over medium-high heat. Turn down the heat to one notch above the lowest setting and cover the pot. In about 15 minutes, the rice should have already absorbed most or all of the liquid. Add the coconut milk, salt, and black pepper; stir very gently once and put the lid back on.
  • Let the rice cook for another 10 minutes or until it appears cooked and all the liquid has been absorbed.
  • Take the pot off the heat and let the rice rest for 10 minutes.
  • Add the fresh chives and give the rice a quick stir; put the lid back on but cover only partially to let some of the steam out.
  • When the rice has cooled down a little, fluff with a fork.
  • This method works well if you cook your rice in a rice cooker as well. You just have to remember to add the coconut milk about 5 minutes before the rice cooker goes ding.
  • Comments are closed