Papaya is one of those fruits that are best eaten when they are very, very ripe. (The only exception, of course, is when you intentionally use papayas when they’re green as the Thai people do when they make the well-known Thai green papaya salad, som tam (ส้มตำ).
I always buy papayas when they’re still a little bit on the green side — the stage in which most papayas are sold in most stores anyway. This allows me to minimize the bruises on the fruit while bringing it home (papayas bruise extremely easily; you even so much as raise your voice with it and it’s bruised all over; that’s why you often see them wrapped in paper or styrofoam nets at the market). Then I leave it on the kitchen counter and let it ripen, undisturbed. This takes about 4-5 days from the purchase date based on the degree of ripeness most of the papayas I’ve purchased usually are. So, buy a papaya 4-5 days before you plan to eat them.
A perfectly ripe papaya takes on a dark shade of orange, becomes wrinkly, appears bruised externally even though it may not be, and sports ugly spots which may look moldy. Sometimes, though, there are actual moldy spots on the skin. This is no big deal, the mold is only skin-deep and requires nothing but peeling, which is what you’re supposed to do anyway. Basically, if your papaya still looks good, it’s probably not ripe enough. It needs to look quite hideous.
 I usually buy my papaya from Asian or Latino grocery stores as those are places where you’re more likely to get the kind of papaya that, in my opinion, is the most delicious. The small Hawaiian papayas that are found in mainstream grocery stores aren’t my cup of tea, to say the least. The longer, larger, meatier papayas are the tastiest to me.
The fact that papayas are best eaten when fully ripe presents a bit of a problem because the softer the fruit, the more fragile it is and the more likely it’s going to fall apart on you in the process of preparing it. But fret not as this is easier than you think.
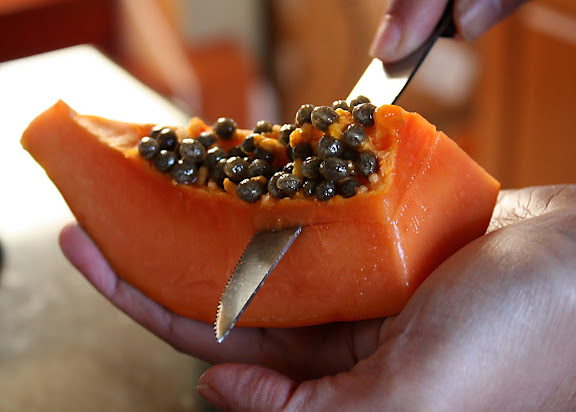
Begin by quartering the papaya: halve it crosswise, then halve each half lengthwise. Depending how big the papaya is, you can cut each quarter lengthwise into 3 or 4 spears. Place on spear, skin side down, on the palm of your non-dominant hand. Hold the sharpest knife in your kitchen (a serrated knife works very well too) in your other hand, positioning the blade horizontally and with the blade pointing away from you, slice off the membrane side, about 2 millimeters deep, in one swift motion (a see-saw motion is easier, if using a serrated knife). The key is to create beautiful, clean, and crisp edges.
Flip the papaya over and slice off the skin in the same way. If each spear is narrow enough, you may be able to get the skin completely off in one go. But if some of the skin is still left, it’s just a matter of picking up the spare, to use bowling jargon.At this point, your sweet-as-honey, perfectly-ripe papaya flesh is ready to serve.
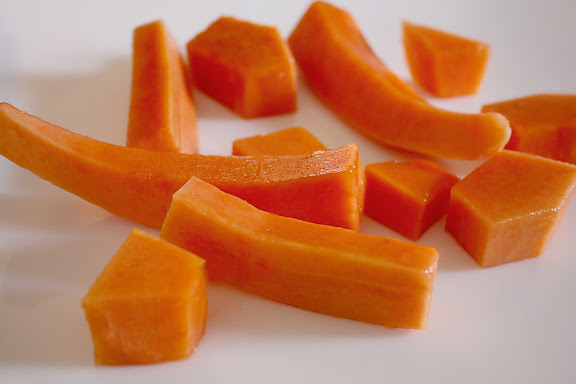
You can serve it in spears or cut each spear crosswise to create bite-sized pieces. If you cut each spear in half lengthwise and then crosswise, you get papaya dice or cubes. The fruit is best served and eaten unadorned, but the Thais like to squeeze a wedge of lime over it. Lime juice brings out the sweetness of the ripe papaya even more.
 If desired, you can even use fresh papaya to teach your kids basic geometry as well. Like I said, this fruit is very versatile.


